Garage doors are one of the few big moving parts in a home that most people never service. They work every day, and they work until they do not. The result is the familiar bang, the stuck door or the burned-out opener.
Maintenance changes that pattern. It costs little, takes little time and catches problems while they are small. This page gives you a schedule, explains what to do and what to avoid, shows how to test the door's safety systems, and explains what a professional tune-up includes. It also covers weather seals and coastal wear, which matter a lot in Santa Monica.
Why maintenance matters
A garage door is a balanced system. Each part depends on the others. When one part wears, the rest work harder.
- Dry rollers and hinges add drag. The springs and opener strain to overcome it.
- Rusty springs lose strength and fail early.
- Loose hardware lets tracks drift and doors bind.
- A misaligned sensor can stop the door from closing at the worst moment.
- A worn seal lets in water, sand, drafts and pests.
Regular attention is inexpensive compared with the cost of an emergency repair. It also keeps the door quieter and safer.
A simple maintenance schedule
| How often | What to do |
|---|---|
| Monthly | Watch and listen as the door runs. Wipe sensor lenses. Check that the door closes fully and reverses on contact. |
| Every six months | Test the balance. Test the auto-reverse. Lubricate. Inspect springs, cables, rollers and hinges. Tighten loose hardware, except spring and bottom-bracket bolts. |
| Every year | Replace remote and keypad batteries. Check the bottom seal and perimeter weatherstripping. Wash the door. Touch up chipped paint. |
| Every few years | Have a professional inspect the springs, cables and hardware. Replace worn rollers and hinges. Replace the opener backup battery if the maker recommends it. |
If you live near the beach, lean toward the shorter end of each interval. Salt and moisture speed up wear.
Visual inspection: what to look for
You can learn a lot by simply looking at the door. Do this from the floor, with the door closed, and then again with the door open.
Springs
Look for rust, gaps in the coil or stretched areas. A torsion spring should look uniform. A gap means the spring has broken.
Cables
Look for fraying, broken strands, rust and kinks. Pay close attention near the bottom brackets and at the drums.
Rollers and hinges
Look for cracked nylon, flat spots, wobbling and loose stems. Look for cracked or bent hinges.
Tracks
Look for dents, bends and gaps. Check that the tracks are level and firmly bolted to the wall.
Panels
Look for cracks, rust, dents and separations where the panels meet.
Opener and sensors
Check that the mounting brackets are secure. Check that the sensor lights are steady.
How to test the balance
A balanced door stays where you leave it. This is the best quick test of spring health.
- Close the door.
- Pull the red release cord to disconnect the opener.
- Lift the door by hand to about halfway.
- Let go carefully.
The door should stay in place, or drift only slightly. If it slams down or shoots up, the springs need attention. Do not adjust them yourself. Reconnect the opener by pulling the release handle toward the opener and running the door, following your model's instructions.
How to test the safety reverse and the sensors
Auto-reverse
Lay a flat board about one and a half inches high on the floor, in the door's path. Close the door with the wall button. It should touch the board and reverse. If it does not, stop using the door and call.
Sensors
Start to close the door and pass an object in front of the sensor beam. Use a broom handle rather than your body. The door should reverse. If it does not, check that both lights are steady, that the lenses are clean and that the sensors face each other. If problems continue, see opener repair.
Lubrication: the right product and the right spots
Lubrication is the single most useful maintenance step. It is also where people make the most mistakes.
Use a product made for garage doors
A silicone-based or lithium-based garage door lubricant is a common choice. Many manufacturers advise against using general-purpose penetrating oils as a long-term lubricant. They can attract dirt and dry out. Check your door's manual for the maker's advice.
Where to lubricate
- Hinges. A light spray on each pivot point.
- Rollers. Lubricate the roller bearings, not the tread that runs in the track. Nylon rollers with sealed bearings may not need it.
- Torsion springs. A light coating along the coils helps them slide instead of grinding.
- Bearing plates. The ends of the torsion shaft turn in bearings. A drop of lubricant helps.
- Opener chain or screw. Follow the opener manual.
Where not to lubricate
- Tracks. Grease attracts dust and creates a sticky paste. Wipe the tracks clean with a dry cloth instead.
- Belts. Belt-drive openers do not need lubricant on the belt.
- Remote controls and electronics. Keep lubricant away from sensors, sensor lenses and circuit boards.
Wipe off any excess. Too much lubricant drips and attracts dirt.
Weather seals: bottom seal and perimeter
Seals do quiet work. They keep out dust, rain, wind, insects and rodents. A worn seal is a common reason a garage feels dusty or damp.
The bottom seal
The bottom seal is a strip of rubber or vinyl along the bottom edge of the door. It fills the gap between the door and the floor. Over time it cracks, flattens or tears.
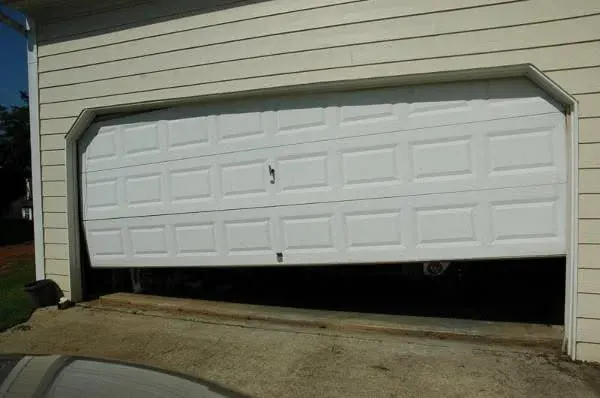
Signs of a worn bottom seal include daylight along the bottom edge, drafts, water pooling inside after rain and debris in the garage. Replacement is a fairly simple job, but the correct type must be chosen. Common types are:
- Bulb seals. A round bead that slides into a retainer channel on the door.
- Beaded or T-type seals. Slide into a channel with two grooves.
- J-type or double-J seals. Common on some steel doors.
- Threshold seals. A strip glued to the floor to help with uneven concrete or water flow.
Perimeter weatherstripping
Vinyl or rubber stops line the sides and top of the door opening. They press against the door when it is closed. Look for gaps, cracks and pieces that have come loose.
Sloped and uneven floors
Some garages have floors that slope to a drain or have cracks that leave a gap. A thicker seal or a threshold strip can help. Tell us if your floor is uneven.
Coastal maintenance for Santa Monica
Being near the ocean changes the maintenance rules. The key difference is corrosion.
- Inspect more often. Check for rust every three to four months on homes near the beach.
- Treat surface rust early. Light rust on hinges, brackets and door edges can be cleaned and touched up. Deep rust that flakes or pits the metal calls for part replacement.
- Protect the bottom edge. The bottom panel and seal sit in contact with moisture and wet concrete. Look for rust and swelling here first.
- Consider coated or galvanized hardware. When you replace springs, cables or brackets, ask about corrosion-resistant options.
- Rinse salt off the door. A gentle wash with clean water and mild soap removes salt deposits that accelerate rust.
- Watch the electronics. Salt air can corrode sensor wire terminals and outdoor keypads.
Santa Monica also gets wind events that blow dust and debris. Check tracks for grit afterward and wipe them clean.
What a professional tune-up includes
A DIY check catches a lot, but a trained technician sees more and can safely work on the parts you should not touch. A professional tune-up usually covers:
- Inspecting the springs, cables and drums. We look for wear, rust and damage.
- Testing balance. We check that the springs are carrying the door.
- Checking rollers, hinges and tracks. Worn parts are noted or replaced.
- Tightening hardware. We tighten what should be tightened and leave alone what should not be.
- Lubricating moving parts. Using the right product on the right parts.
- Inspecting the opener. We check the mounting, the drive, the limits and the force.
- Testing safety devices. Auto-reverse and sensors.
- Checking seals and weatherstripping. We note anything worn.
- Explaining what we found. You get a plain summary and a free written quote for anything that needs work.
If everything is in good shape, we tell you that too.
Maintenance for different properties
Single-family homes
A twice-a-year check is usually enough. If the door is used often or the home is near the beach, add a seasonal look.
Rental properties
Landlords should schedule an annual check. Tenants often do not notice slow problems or report them late. A simple written record of checks and repairs is helpful.
Condos and apartment buildings
Shared doors run hundreds or thousands of cycles a month. They need more frequent checks than a house door. See commercial and multi-unit repair.
Homes with driveway gates
Gates have their own maintenance needs, including operator checks and track cleaning. See gate repair.
Common maintenance mistakes
- Spraying general-purpose oil on everything and never wiping it off.
- Greasing the tracks.
- Ignoring a small noise until it becomes a large failure.
- Bypassing a sensor because it is irritating.
- Tightening spring or bottom bracket hardware without the right tools and knowledge.
- Using the opener to force a door that is stuck.
- Ignoring rust on cable ends and brackets.
A 30-minute do-it-yourself check, step by step
You do not need special tools for a good basic check. Set aside half an hour on a dry day and work through these steps in order.
- Clear the area. Move cars and stored items away from the door. You want room to see all sides.
- Watch the door run. Open and close it once or twice with the wall button. Listen for grinding, scraping and popping. Watch for jerking, tilting or slow spots.
- Look at the tracks. With the door open, check both sides for dents, gaps and loose brackets. Wipe the inside of each track with a dry cloth.
- Look at the rollers. Check each one for cracks, flat spots and wobble. Note any that look worn.
- Look at the hinges. Check for cracks around the screws and pin holes.
- Look at the springs and cables. Note rust, gaps or frayed strands, but keep your hands away.
- Tighten loose hardware. Snug the bolts on the track brackets and hinges with a wrench or a screwdriver. Do not touch the spring bolts or the bottom brackets.
- Lubricate. Spray hinges, roller bearings, spring coils and bearing plates, then wipe off any excess.
- Do the balance test. Disconnect the opener with the door closed and lift the door halfway.
- Do the auto-reverse test. Use a flat board about one and a half inches high.
- Check the sensors. Wipe the lenses and confirm both lights are steady.
- Check the seals. Look along the bottom and sides for gaps and cracks.
- Write down what you found. A note with the date makes it easy to see changes next time.
If the door fails any test, or if you see damaged springs, cables or brackets, stop and call (424) 610-8406.
A seasonal calendar for Santa Monica
The local climate shapes when to look at the door. Use these prompts as reminders.
Late fall, before the rainy months
Santa Monica's rain comes mostly in the cooler months. Check the bottom seal and the perimeter weatherstripping before it starts. Look for spots where water could enter, and make sure the floor drains away from the door. Replace a cracked seal now, not after a storm.
Winter and early spring
Damp mornings and rain speed rust on unprotected steel. Look at the bottom brackets, cable ends and track fasteners after wet weeks. Wipe moisture off the bottom edge of the door if water pools there.
Late spring and summer
Marine-layer mornings keep the coast damp, then afternoon sun heats the door. Dark doors on sun-facing walls can get very warm. Check that finishes are not peeling and that nothing has warped. This is also a good time for the six-month lubrication and balance check.
Fall wind and dust events
Wind can blow grit into tracks and onto sensors. After a windy spell, wipe the tracks and sensor lenses. Check that outdoor items did not strike the door.
Any time of year
Wash salt off the door with clean water and mild soap. Do this more often if you are close to the beach.
When to stop and call a professional
Maintenance is for spotting and preventing problems. It is not for fixing dangerous ones. Stop and call if you see any of the following.
- A gap in a torsion spring coil, or a spring that looks stretched or rusted through.
- A frayed, kinked or slack cable, or rust on the cable near the bottom bracket.
- A door that fails the balance test by a wide margin.
- A door that fails the auto-reverse test.
- A track that is bent, cracked or pulling away from the wall.
- Rollers that are cracked or missing.
- Cracked panels or hinges.
- Sensors that need constant realigning.
- An opener that runs loudly, smokes or smells hot.
These are signs that a part is close to failure. A planned repair is safer, quieter and usually less costly than a failure at the worst moment.
Record keeping and manufacturer warranties
Keep a simple file for your door. It should include the door brand and model, the opener model, the install date, the spring rating if known and receipts for any repair or maintenance. That makes the next repair faster.
Some manufacturers set conditions on their warranties, such as installation by a qualified installer or reasonable maintenance. Read your warranty paperwork. If you are unsure what it requires, ask the maker or installer. We do not offer legal advice on warranties, but we are glad to write down what we inspected and what we found.
Records also matter if you are selling. Buyers and inspectors like to see that garage doors, openers and safety devices have been looked after.
Cost of maintenance compared with cost of failure
Maintenance is one of the cheapest things you can do for a garage door. Lubricant costs a few dollars. A twice-a-year check costs an hour of your time. A professional tune-up costs more than that, but far less than a full repair after a failure. A door that fails suddenly can also damage a car, block the household or force an emergency call at an inconvenient hour.
Think of it the way you think about servicing a car. Small, regular attention prevents big, unexpected bills. The garage door is a machine that works harder than most people realize.
Making maintenance a habit
The best schedule is the one you keep. Pick two dates, such as the start of spring and the start of fall, and tie the check to something you already remember. Keep the lubricant and a soft cloth on a shelf near the garage door. Put a note in your phone. A few minutes twice a year is all it takes to keep most garage door troubles away.
Frequently asked questions about garage door maintenance
How often should garage door maintenance be done?
What is the best lubricant for a garage door?
Should I lubricate the garage door tracks?
How do I know if my garage door is balanced?
How do I replace a garage door bottom seal?
Does coastal air damage garage doors?
What does a professional garage door tune-up include?
Can I do garage door maintenance myself?
Want a professional garage door tune-up?
Call to schedule an inspection. We will check the whole system, explain what we find and give you a free written quote for anything that needs work.
Call (424) 610-8406